To install a cable management system, first plan the layout and gather necessary tools. Then, secure cables with clips or ties.
A well-organized workspace boosts productivity and safety. A cable management system helps achieve this by reducing clutter and preventing tripping hazards. It also extends the lifespan of cables by avoiding tangling and excessive bending. Proper installation ensures your cables are neatly arranged and easy to access.
This process involves planning the layout, selecting appropriate tools, and methodically securing each cable. By dedicating a bit of time and effort, you can create a clean, efficient, and safe environment. This guide will help you achieve a professional and tidy setup, whether at home or in the office.
Introduction To Cable Management
Cable management is a system to organize cables. It keeps them tidy and safe. Proper cable management is important for any setup. Whether it’s your home office or entertainment area, managing cables well can make a big difference.
The Importance Of Organization
Organization in cable management keeps your space neat. It prevents cables from tangling. Tangled cables can be a headache. They make it hard to find the right cable. Organized cables also reduce the risk of tripping and accidents.
Organized cables help in easy maintenance. You can spot issues quickly. It saves time and effort. A well-organized cable setup also looks professional. This is important in office environments.
Potential Benefits
Proper cable management offers many benefits. Here are some key advantages:
- Safety: Reduces risks of tripping and fire hazards.
- Efficiency: Makes it easy to find and replace cables.
- Durability: Protects cables from damage and wear.
- Aesthetics: Improves the look of your space.
- Performance: Prevents signal interference and improves device performance.
Here is a comparison table of organized vs. unorganized cables:
| Aspect | Organized Cables | Unorganized Cables |
|---|---|---|
| Safety | Low Risk | High Risk |
| Maintenance | Easy | Difficult |
| Appearance | Neat | Messy |
| Durability | High | Low |
| Performance | Better | Poor |
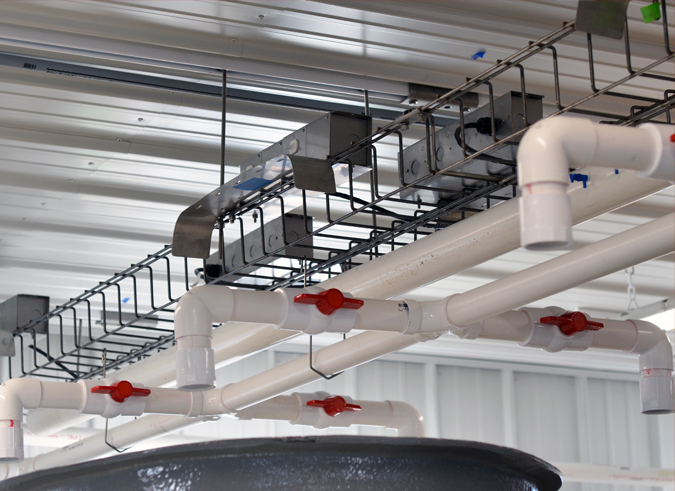
Investing in a good cable management system is wise. It brings order to chaos. It also adds value to your space.
Credit: www.snaketray.com
Tools And Materials Needed
Before installing a cable management system, gather the right tools and materials. This ensures a smooth installation process. Let’s dive into the essentials.
Essential Tools For The Job
You need specific tools to install a cable management system. Here are the must-have tools:
- Screwdriver Set: Different sizes for various screws.
- Drill: For making holes in walls or desks.
- Measuring Tape: Ensure precise measurements for cable lengths.
- Level: Keep your installation straight and tidy.
- Wire Strippers: To strip off insulation from cables.
- Utility Knife: Cut through cable ties and other materials.
- Hammer: For securing clips and fasteners.
Materials And Cable Management Accessories
Along with tools, gather the necessary materials and accessories. These will help organize and secure the cables:
- Cable Ties: Keep cables bundled together.
- Cable Clips: Secure cables to walls or desks.
- Raceways: Hide and protect cables along walls.
- Cable Sleeves: Group multiple cables into one neat bundle.
- Adhesive Pads: Attach clips and holders without drilling.
- Labeling Tags: Identify each cable easily.
- Velcro Straps: Adjustable and reusable cable ties.
With these tools and materials, you’re ready to start your cable management project. Happy organizing!
Pre-installation Planning
Pre-Installation Planning is vital for a successful cable management system. This phase ensures you know where to place cables and how to organize them. Good planning saves time and avoids future problems.
Assessing Your Space
First, measure your room. Note where all devices are located. Check for existing power outlets. Create a rough sketch of the space.
Next, identify areas with heavy cable use. These could be your desk, TV area, or router spot. Knowing these areas helps in planning the cable routes.
| Device | Location | Cable Type |
|---|---|---|
| Computer | Desk | Power, Ethernet |
| TV | Living Room | HDMI, Power |
| Router | Hallway | Ethernet, Power |
Designing Your Cable Layout
Start by listing all the cables you need. Write them down:
- Power cables
- HDMI cables
- Ethernet cables
Then, decide the best routes for these cables. Shorter routes are better. They use less cable and look neater.
Use cable clips or channels to guide your cables. Plan where these will be placed. Mark these spots on your sketch.
Finally, think about future changes. Leave some space for extra cables. This will make future updates easier.
Safety First
Installing a cable management system is essential for an organized workspace. Safety should always come first. Ensuring safety prevents accidents and ensures a smooth installation process.
Understanding Electrical Safety
Understanding electrical safety is crucial. Electricity can be dangerous if not handled properly. Always turn off the power before starting. Use a voltage tester to confirm the power is off. Avoid working in wet areas. Water and electricity do not mix. Keep children and pets away from the work area.
Personal Protective Equipment
Using personal protective equipment (PPE) is a must. PPE keeps you safe from potential hazards. Wear insulated gloves to protect your hands. Safety goggles shield your eyes from debris. Use a dust mask to avoid inhaling dust particles. Wear non-slip shoes for good footing.
Mounting The Cable Trays
Mounting the cable trays is an essential step in setting up your cable management system. Proper installation ensures that your cables are well-organized, safe, and easily accessible. This section will guide you through the process of mounting the cable trays, focusing on choosing the right location and securing the trays.
Choosing The Right Location
Selecting the correct location for your cable trays is crucial. Follow these simple steps:
- Identify High-Traffic Areas: Avoid placing trays where people walk often.
- Consider Accessibility: Ensure you can easily access the trays for maintenance.
- Plan for Future Expansion: Leave space for adding more cables later.
Choosing the right location helps in maintaining an organized workspace. It also prevents potential hazards and ensures the longevity of your cable management system.
Securing The Trays
Securing the trays properly is essential for a stable setup. Follow these steps:
- Gather Tools: You will need screws, brackets, and a drill.
- Mark Drill Points: Use a marker to indicate where you will drill holes.
- Drill Holes: Carefully drill holes at the marked points.
- Attach Brackets: Secure the brackets to the wall or ceiling.
- Mount the Trays: Place the trays onto the brackets and fasten them.
Ensure all trays are level and securely fastened. This will prevent any sagging or damage to your cables.
Here’s a quick checklist to help you:
- Have all necessary tools ready.
- Double-check your measurements.
- Ensure all screws and brackets are tight.
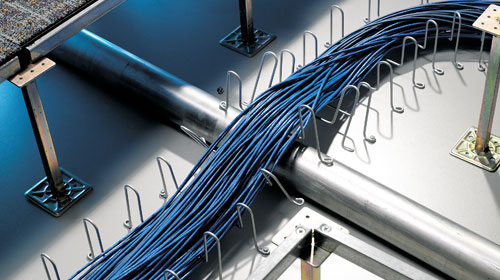
Properly mounted trays will make your cable management system efficient and reliable.
Credit: www.accessfloorsystems.com
Routing Cables
Routing cables is a key part of installing a cable management system. Properly routed cables ensure a clean and organized workspace. It also helps in maintaining the longevity of the cables.
Organizing Cables By Type
Organize your cables by type before routing them. This helps in identifying each cable easily.
- Power Cables: Keep power cables separate from data cables. It reduces interference.
- Data Cables: Group all data cables like Ethernet, HDMI, and USB together.
- Audio Cables: Keep audio cables away from other cables to prevent noise.
Use a table to list your cables:
| Cable Type | Purpose |
|---|---|
| Power Cables | Supply power to devices |
| Data Cables | Transfer data between devices |
| Audio Cables | Transmit audio signals |
Using Cable Ties And Labels
Cable ties and labels help in maintaining organized cables. Use them to bundle and mark cables.
- Bundle Cables: Use cable ties to bundle cables neatly. This keeps them from tangling.
- Label Cables: Attach labels to each cable. Write the type and purpose on the labels. This makes identification easy.
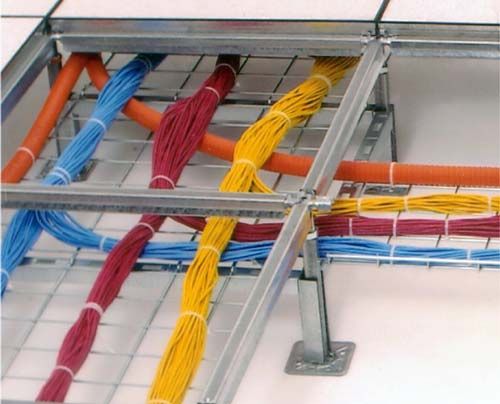
Consider color-coded labels. They offer quick visual identification.
For example:
- Red labels for power cables
- Blue labels for data cables
- Green labels for audio cables
With these steps, your cables will be well-organized and easy to manage.
Installing Cable Raceways
Installing cable raceways is a great way to keep your cables organized. They help you avoid the mess of tangled wires. This guide will show you how to install cable raceways step by step.
Cutting To Length
First, measure the length you need for the raceway. Use a tape measure to get accurate measurements. Mark the measured length on the raceway with a pencil.
Next, use a saw to cut the raceway to the marked length. A fine-toothed hacksaw works best for this task. Ensure you cut straight to fit the raceway perfectly. After cutting, smooth the edges with sandpaper.
Affixing To Walls Or Desks
Start by cleaning the surface where you will attach the raceway. Use a damp cloth to wipe away any dust or dirt.
For walls, you have two options: adhesive backing or screws. If using adhesive backing, peel off the protective layer. Press the raceway firmly against the wall for a few seconds. For screws, use a drill to make pilot holes. Insert screws into the pilot holes and tighten them to secure the raceway.
For desks, adhesive backing is usually enough. Peel off the protective layer and press the raceway onto the desk. Hold it for a few seconds to ensure it sticks well.
Ensure the raceway is level before securing it. Use a spirit level to check this. A straight raceway looks tidy and professional.

Credit: docs.oracle.com
Cable Management Tips
Managing cables can be a challenge. Proper organization ensures a clean workspace. Here are some essential tips for effective cable management.
Avoiding Common Mistakes
Many people make mistakes with cable management. Avoid these common errors:
- Over-tightening Cable Ties: Tight ties damage cables.
- Ignoring Cable Labels: Unlabeled cables cause confusion.
- Using the Wrong Tools: Always use tools made for cables.
Maintenance And Upkeep
Good cable management needs regular upkeep. Follow these steps:
- Check Cables Monthly: Look for wear and tear.
- Clean Dust Regularly: Keep cables free of dust.
- Replace Damaged Cables: Never use frayed cables.
Use a table for quick tips:
| Task | Frequency |
|---|---|
| Check for Damage | Monthly |
| Clean Dust | Weekly |
| Label New Cables | As Needed |
Advanced Cable Management Techniques
Managing cables can be a daunting task. Yet, it is crucial for clean and efficient workspaces. Advanced cable management techniques can simplify this task. These methods ensure cables remain organized and accessible. Let’s explore some sophisticated strategies to manage cables better.
Incorporating Cable Sleeves
Cable sleeves bundle multiple wires together. They protect cables and keep them neat. There are different types of cable sleeves:
- Split Sleeves: Easy to add or remove cables.
- Velcro Sleeves: Adjustable and reusable.
- Heat-Shrink Tubing: Secure and professional look.
Choose a sleeve based on your needs. Measure the total diameter of your cables. Select a sleeve with the right size. Follow these simple steps:
- Gather all cables you want to organize.
- Slide or wrap the sleeve around the cables.
- Secure the sleeve using ties or clips.
Using cable sleeves can transform a cluttered mess into a tidy setup.
Utilizing In-desk Solutions
In-desk solutions hide cables within the desk. They keep your workspace looking clean and organized. Common in-desk solutions include:
| Solution | Description |
|---|---|
| Grommets | Holes in the desk for cables to pass through. |
| Cable Trays | Mounted under the desk to hold cables. |
| Power Outlets | Built into the desk for easy access. |
Here is how to use grommets:
- Drill a hole in your desk where you need it.
- Insert the grommet into the hole.
- Pass cables through the grommet.
For cable trays, follow these steps:
- Mount the tray under your desk.
- Route cables into the tray.
- Secure cables with clips or ties.
In-desk solutions keep cables out of sight. They provide a sleek, professional workspace.
Final Inspection And Testing
Once you have installed your cable management system, it is crucial to perform a final inspection and testing. This ensures everything works properly and safely. The following steps will guide you through ensuring functionality and conducting a safety check.
Ensuring Functionality
First, check all the cables. Make sure they are neatly organized. Verify that each cable is connected to the correct device. Turn on all the devices to see if they work. If a device does not work, check the cable connections.
Next, look for any loose cables. Tighten them securely. Check if the cable ties are holding the cables firmly. Adjust if necessary. Ensure that no cable is under too much tension. This can cause damage over time.
Finally, inspect the cable management accessories. Make sure they are intact. Replace any broken parts. Confirm that all clips, ties, and holders are in place.
Conducting A Safety Check
Safety is vital. Start by inspecting all cables. Look for wear and tear. Replace damaged cables immediately. Check for frayed wires or exposed metal. These are hazards.
Next, ensure all cables are not blocking walkways. This prevents tripping hazards. Organize cables away from foot traffic areas. Use cable covers if necessary.
Check that all power cables are away from heat sources. Heat can damage cables. Ensure cables are not pinched under heavy furniture. This can cause damage and create fire hazards.
Lastly, test all electrical connections. Use a multimeter to check voltage levels. Ensure they match the device requirements. Test for any short circuits. Fix any issues promptly.
By following these steps, your cable management system will be safe and functional. Enjoy an organized and hazard-free space!
Frequently Asked Questions
How Do I Add Cable Management?
To add cable management, use cable ties, clips, and sleeves. Route cables behind furniture or under desks. Label cables for easy identification.
How Do I Set Up Cable Manage Tv?
Mount the TV on the wall. Use cable clips or a cable management box. Bundle cables with zip ties. Hide cables behind furniture or use a cord cover.
What Is Needed For Pc Cable Management?
You need cable ties, Velcro straps, and cable sleeves. Use adhesive mounts and clips to secure cables. Ensure good airflow.
How To Cable Manage A Pc Setup?
Organize cables with zip ties and Velcro straps. Route cables behind the desk. Use cable management sleeves. Label each cable. Secure excess lengths with clips.
Conclusion
A well-installed cable management system keeps your workspace tidy and efficient. Follow these steps for a clutter-free environment. Proper organization not only improves aesthetics but also boosts productivity. Don’t underestimate the power of a clean setup. Start managing your cables today and enjoy a more organized space.